
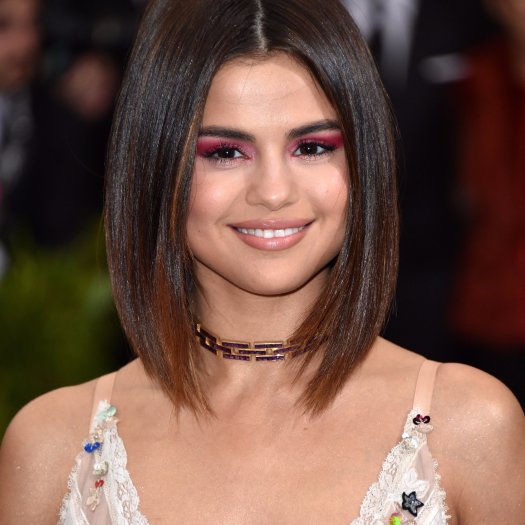
Hey guys, I’m back today with a very simple but bright and out there eye look today. Pink is considered a scary colour because it can make your eyes look irritated and doesn’t really compliment many eye colours. Recently I saw Selena Gomez sport a pink smokey eye to the Met Gala and honestly I thought she looked stunning! I love the pop of colour against a bronzed face.
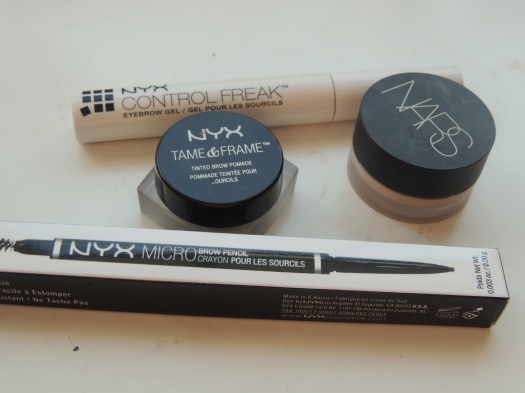
I’m going to do a full face tutorial today since I’ve used a couple of new products, so as per I’m starting with my brows, I used my usual Nyx combination of pencil, pomade and gel.
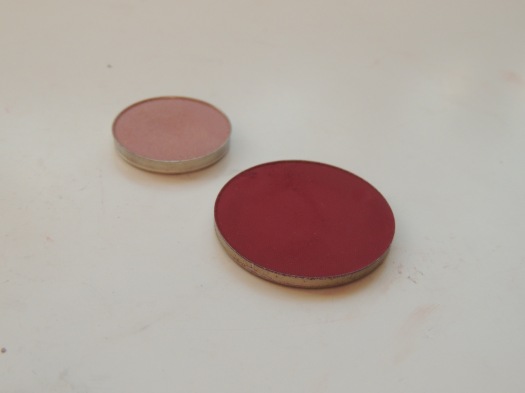
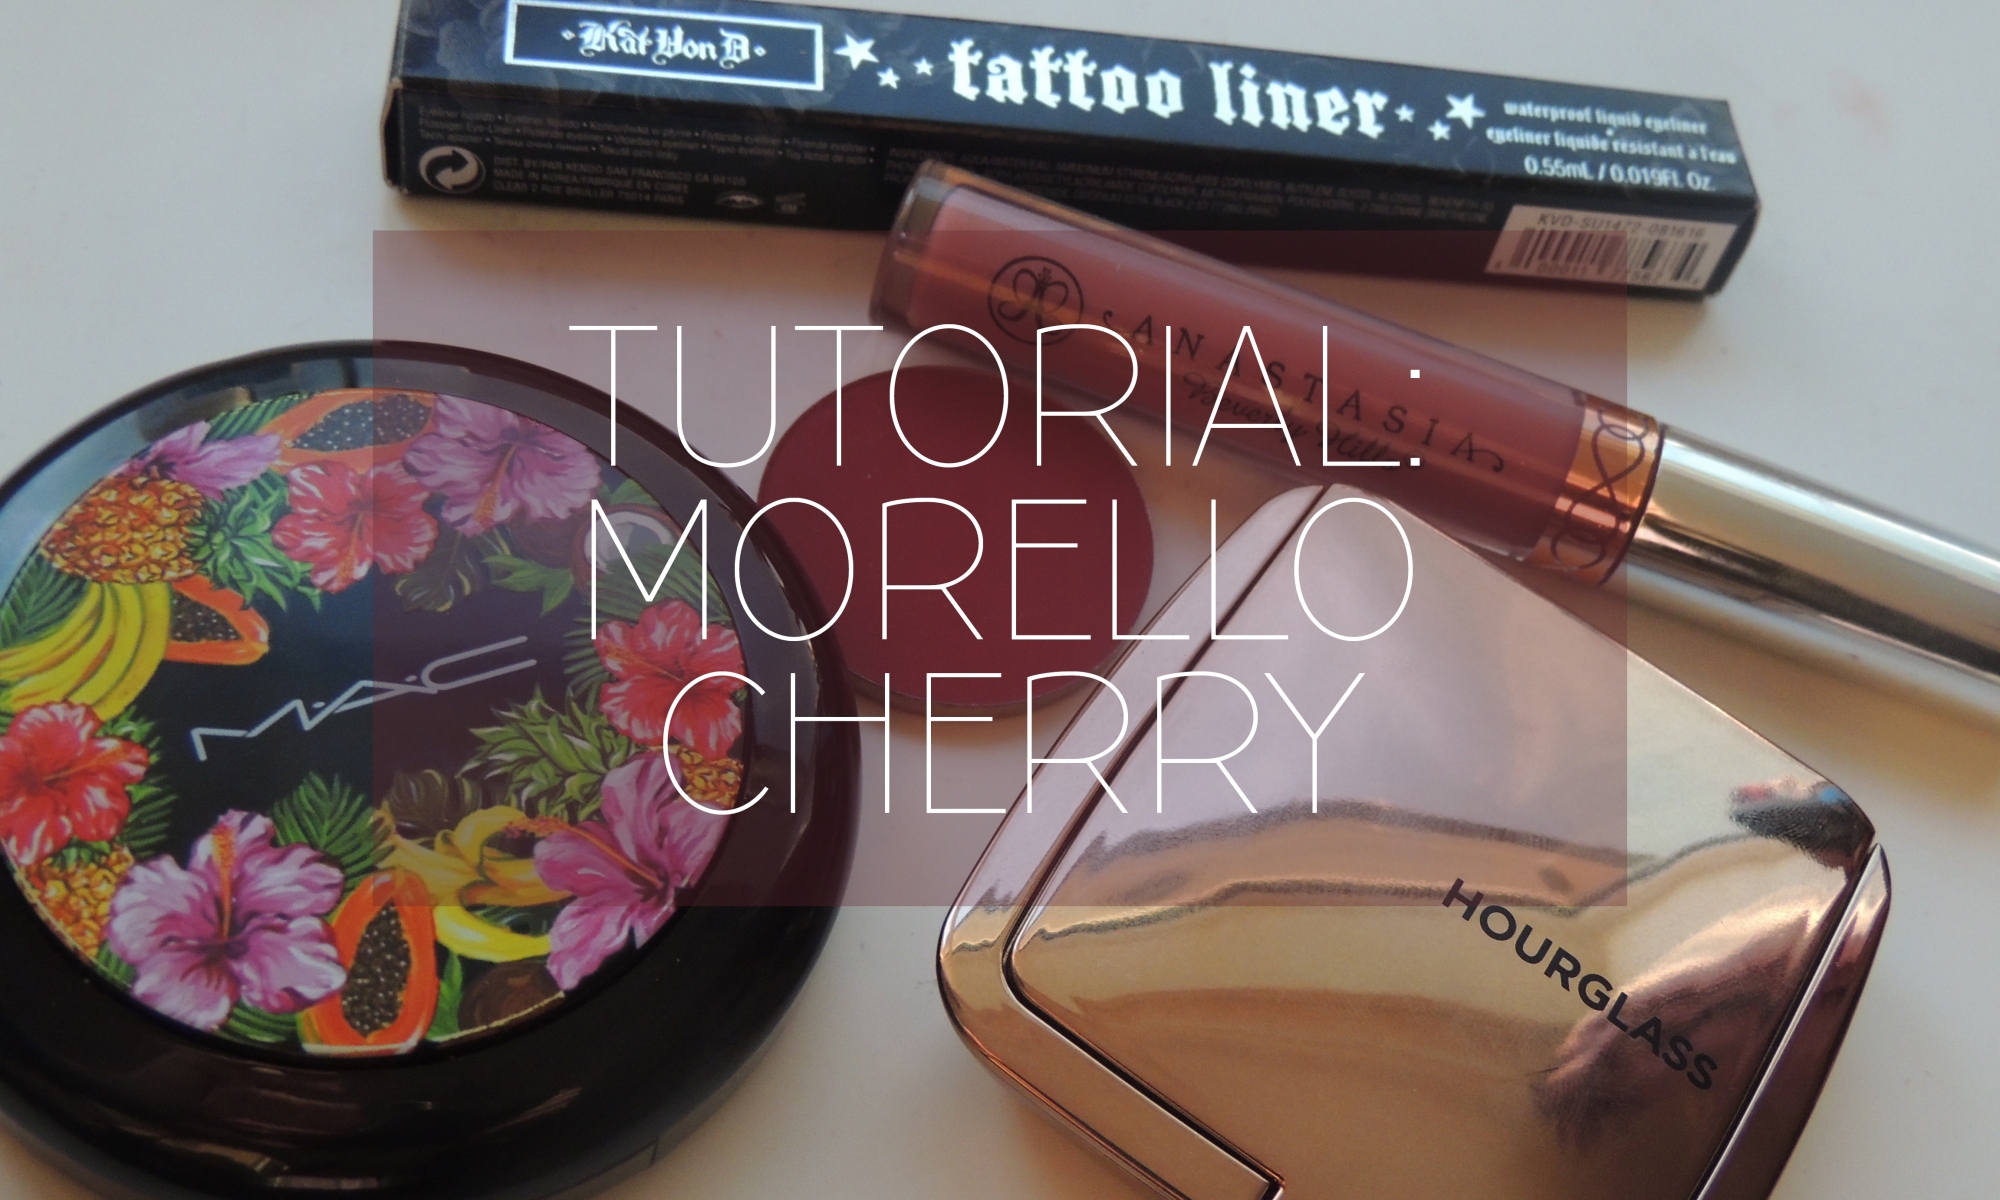
For the eyes I primed with my Nars concealer and set with my face powder and jumped into the star of the show. I recently bought a Make Up For Ever eyeshadow in the shade Morello Cherry (M-846). So I went in with this to begin with not knowing how pigmented it would be but I was shocked, it’s more than just a shadow it feels like a matte pressed pigment bursting with colour. So after I did a light wash of this colour I blended it out with Makeup Geek Petal Pusher. I built up the Cherry colour on the outer corner keeping the intesity here and blending inwards and outwards to create the perfect blown out smokey eye. For the lid I just packed on a little bit of white shadow to brighten that area.

Selena didn’t have winged liner but I thought I’d add my own touch to it so I made some long thick wings using Kat Von D’s Tattoo eyeliner pen and I also added a little point in my tearduct to elongate my eyes which made this whole look a lot more edgy and then continued to line my upper lash line to fill in the white gaps with Nyx Tres Jolie gel pencil.
♥
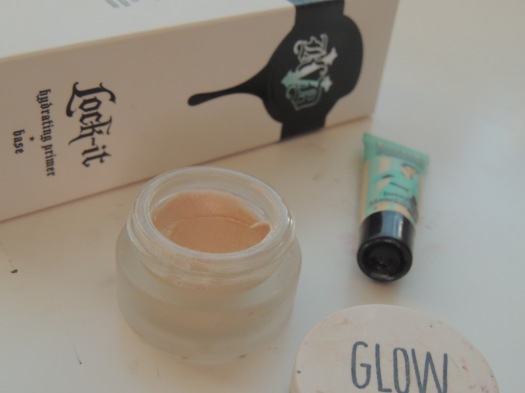
For my base I’m using my fave base at the moment which is a combination of the Kat Von D Lock it hydrating primer, Benefit Porefessional and the Topshop Glow pot in Polished.
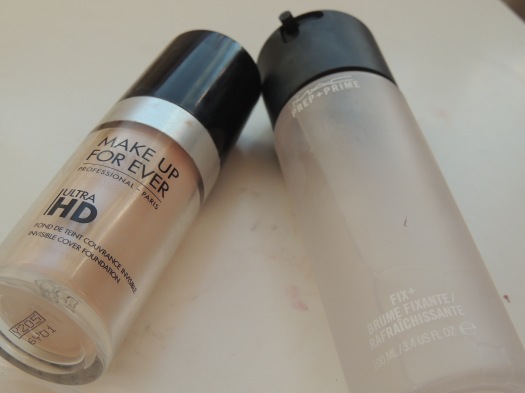
Since I’m pale I knew I was never going to look as bronzed as Selena and since I was wearing all black I thought I would make the pink stand out by using only my paler foundation and concealers. So I spritzed my face with Fix Plus and then covered my face with the Make Up For Ever Ultra HD foundation.
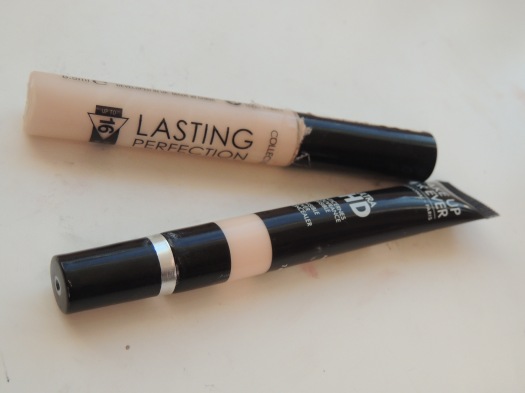
And to conceal I used Collection Lasting Perfection concealer on spots and my darkest area under my eye and then to brighten and highlight Make Up For Ever Ultra HD concealer.


To set my face I used my usual MAC Studio Fix shade in NC10 and to brighten areas I mixed that with MAC Shivering White. To contour I bought a new Nyx Contour kit so I used the shade Sculpt and then to subtly bronze I used MAC Oh My Passion PearlMatte face powder.
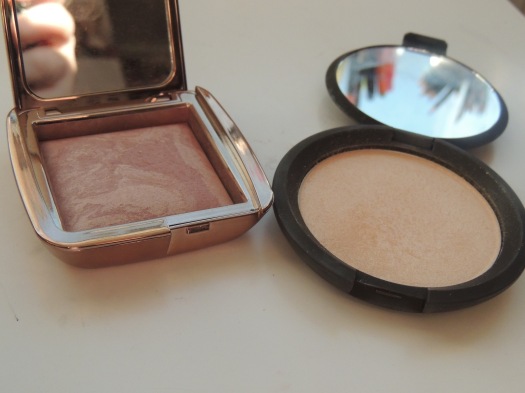
For blush I took Hourglass Mood Exposure, quite a neutral colour and to highlight Becca Moonstone.


Jumping back onto eyes I used a mix of Urban Decay 24/7 glide on pencil in Woodstock and No7 Stay Perfect pencil in purple to line my waterline, I’ve not been using black in my waterline recently as it always gets everywhere. After smudging this between my lower lashes I took the same Morello Cherry colour from earlier and blended this out slightly. For lashes I didn’t use falsies but did do a few generous coats of Maybelline Lash Sensational mascara.

The final step is lips and I kept in with the pink theme and chose Anastasia Beverly Hills Dusty Rose. It’s not as bright as the eyes and in some ways I think a brighter more raspberry pink would have looked better but Dusty Rose is the closest I had.


So that’s all for this pretty simple tutorial, I hope you all enjoyed it. If you’re looking for bright colours and want to experiment with pink definitely get your hands on Morello Cherry, such a lovely eyeshadow!
Thank you, see you soon! xo

Omg soo beautiful! I love this makeup look and you have serious makeup skills girl! 😍😍
Pearl || https://thepearlylife.wordpress.com
LikeLiked by 1 person
I love this look on you! You look fabulous! I wish I could do my makeup this good!
Would love for you to check out my latest post xx
LikeLiked by 1 person
This looks lovely on you!! Great post 🙂
LikeLiked by 1 person
I love this look on you so much!!! 😍😍😍 And I love how in depth you made this tutorial! 💛
LikeLiked by 1 person
I love this look – I am not sure how well I would be bale to pull this off though! You’ve done such an amazing job, and this post is so detailed its perfect! I have actually nominated you for an award, feel free to check it out – https://jademayhead1.wordpress.com/2017/06/27/liebester-award2/
LikeLiked by 1 person
It’s always a risk playing about with bright colours but you’ll never know how good it’ll look until you try! Aw thank you so much that’s so sweet of you I’ll get nominating soon 😙xo
LikeLiked by 1 person
That’s true! I never felt pink looks any good on me though, but you have pulled it off perfectly!xo
LikeLiked by 1 person
How fun! I love this colorful look! xx.
LikeLiked by 1 person
beautiful look!
LikeLiked by 1 person